
Flip your front room right into a first-class photographic museum by putting in an interactive show. No, this isn’t a kind of “dime-a-dozen” convert a discarded digital pill into a photograph body tasks. Somewhat, you’ll be working, and viewing, on the chopping fringe of know-how sporting a rotary digital show housed inside an exquisite shadow field. This show begs viewers to twist the rotary dial and look at the embedded pictures.

First issues first, nevertheless. In an effort of full disclosure, not like most “photographic tasks,” constructing this interactive show would require a considerable amount of pc programming. Fortunately, none of this programming requires you to put in writing any code. Simply comply with together with these easy steps for loading three applications onto your pc, assembling your pictures, and transferring the pictures to the rotary show. And that’s all there may be to it.
I Need to Wait How Lengthy?
You will have three items of {hardware} for constructing your personal interactive photographic show:
1. First, and foremost, it would go with out saying, however you’re gonna want a pc. Any taste and any measurement will work. This really is a PC-agnostic mission.
2. An important ingredient in constructing this mission is the rotary dial manufactured by M5Stack. Often called the Dial v1.1, however known as M5Dial all through this mission, this $34.90 gadget contains a rotary encoder that can management the show of your pictures on its included 1.28-inch show. Moreover, it may be simply powered by any smart-device charger, PC, or exterior energy financial institution.
3. With a view to showcase the M5Dial inside a professional-looking museum-quality housing, you will want a small shadowbox. Your most popular shadowbox needs to be giant sufficient to carry the M5Dial, in addition to having the ability to conceal the rear mounted energy provide. The shadowbox illustrated on this mission is the Sunmeg 8×8 Field Body Show Case. This $8.99 instance is good for shaping into a firstclass interactive show.

Getting the Software program for Your Interactive Photographic Show
When you’ve obtained the entire {hardware}, it’s time to load up your PC with the entire required software program:
1. With a view to load the picture viewing program on the M5Dial, you’ll want the FREE M5Burner utility. Simply head over to the M5Stack software program obtain website and choose the M5Burner set up program that’s appropriate in your PC.
2. This system you’ll use for importing your photographs to the M5Dial is PlatformIO Command Line Interface (CLI). You must obtain this FREE utility in your specific PC working system. Observe these directions for putting in and organising PlatformIO CLI in your PC. Linux customers may also want to put in udev guidelines.
3. This system that’s used on the M5Dial for displaying and interacting along with your pictures is on this GitHub website. An enormous thanks goes to person saitotetsuya (3110) for making this program freely obtainable to any M5Dial proprietor who needs to construct this mission. Click on the inexperienced “Code” button on the prime of the display screen, obtain the entire mission as a ZIP archive, and broaden it in your most popular location.

The Enjoyable Half: Constructing Your Interactive Photographic Show
When you’ve assembled your {hardware} and software program, the enjoyable is about to start. Learn these steps rigorously and completely earlier than you start. No particular expertise or information is required…only a eager sense of journey and a smidgen of crafting will likely be wanted. Right here we go:
Step 1: Put together your shadowbox
Two issues should be achieved to the shadowbox: take away the clear plastic cowl and lower a 45mm diameter gap into the again of the shadowbox. First, take away the clear plastic cowl. This plastic should be damaged for elimination. Be Cautious! Subsequent, take a robust, sharp knife and lower a gap within the again. Thoughtfully, M5Stack has offered a template contained in the M5Dial field for measuring this opening to the correct measurement. You could lower via each the cardboard again and the skinny trim sheet that covers the cardboard. Set the ready shadowbox apart, for now.

Step 2: Dimension your pictures.
The scale for the M5Dial show are 240- x 240-pixels. Sure, that sounds small, however your pictures will nonetheless look nice on this show. Be sure that you save your sized pictures as JPEGs after which copy them into the “information” folder inside that GitHub archive you downloaded in Software program step 3, above. Protecting every of your pictures to an approximate file measurement of 20KB will allow you to load 10-20 pictures into the “information” folder for subsequent importing to the M5Dial.

Step 3: Set up the M5Dial program
Join the M5Dial to your pc utilizing the provided USB cable. First, plug the USB-A plug into your PC. Now, it’s essential to press and maintain the “invisible button” black/pink space on the again of the dial that’s labeled: BTN whereas inserting the USB-C plug into the gadget. Your dial is now in programming mode and the show needs to be black. Congrats; you’ve simply completed the trickiest a part of this complete mission.
Now begin the M5Burner utility. Find and choose the Dial gadget alongside the lefthand aspect of the principle window. Scroll via the record of M5Dial software program in the principle window and obtain, “Picture Viewer.” As soon as the obtain is full, “burn” the viewer to your linked M5Dial. Contained in the Burn Picture window, choose your USB port connection from the COM dropdown menu. Click on burn then shut the window on completion and exit the M5Burner utility. Disconnect your M5Dial.


Step 4. Load your pictures onto the M5Dial.
Throughout this extremely prolonged process, you’re going to suppose that your PC has change into unresponsive. Please be affected person, very affected person, relying upon the processing velocity in your PC this step might take over 50 minutes to finish. With a view to start, first reconnect the M5Dial to your PC utilizing the identical process mentioned in Step 3, above. Then research the ReadMe_en_US.md file contained in the GitHub Picture Viewer folder. Within the part labeled: Importing Pictures to Show, consult with this line:
Execute `pio run –goal uploadfs` from the command line.
That is the command that you will want to sort into your PC terminal program. As soon as applied, this command can take as much as 50 minutes to finish. When it’s achieved, your entire pictures will likely be saved on the M5Dial. Exit your terminal program in your PC and disconnect the M5Dial.
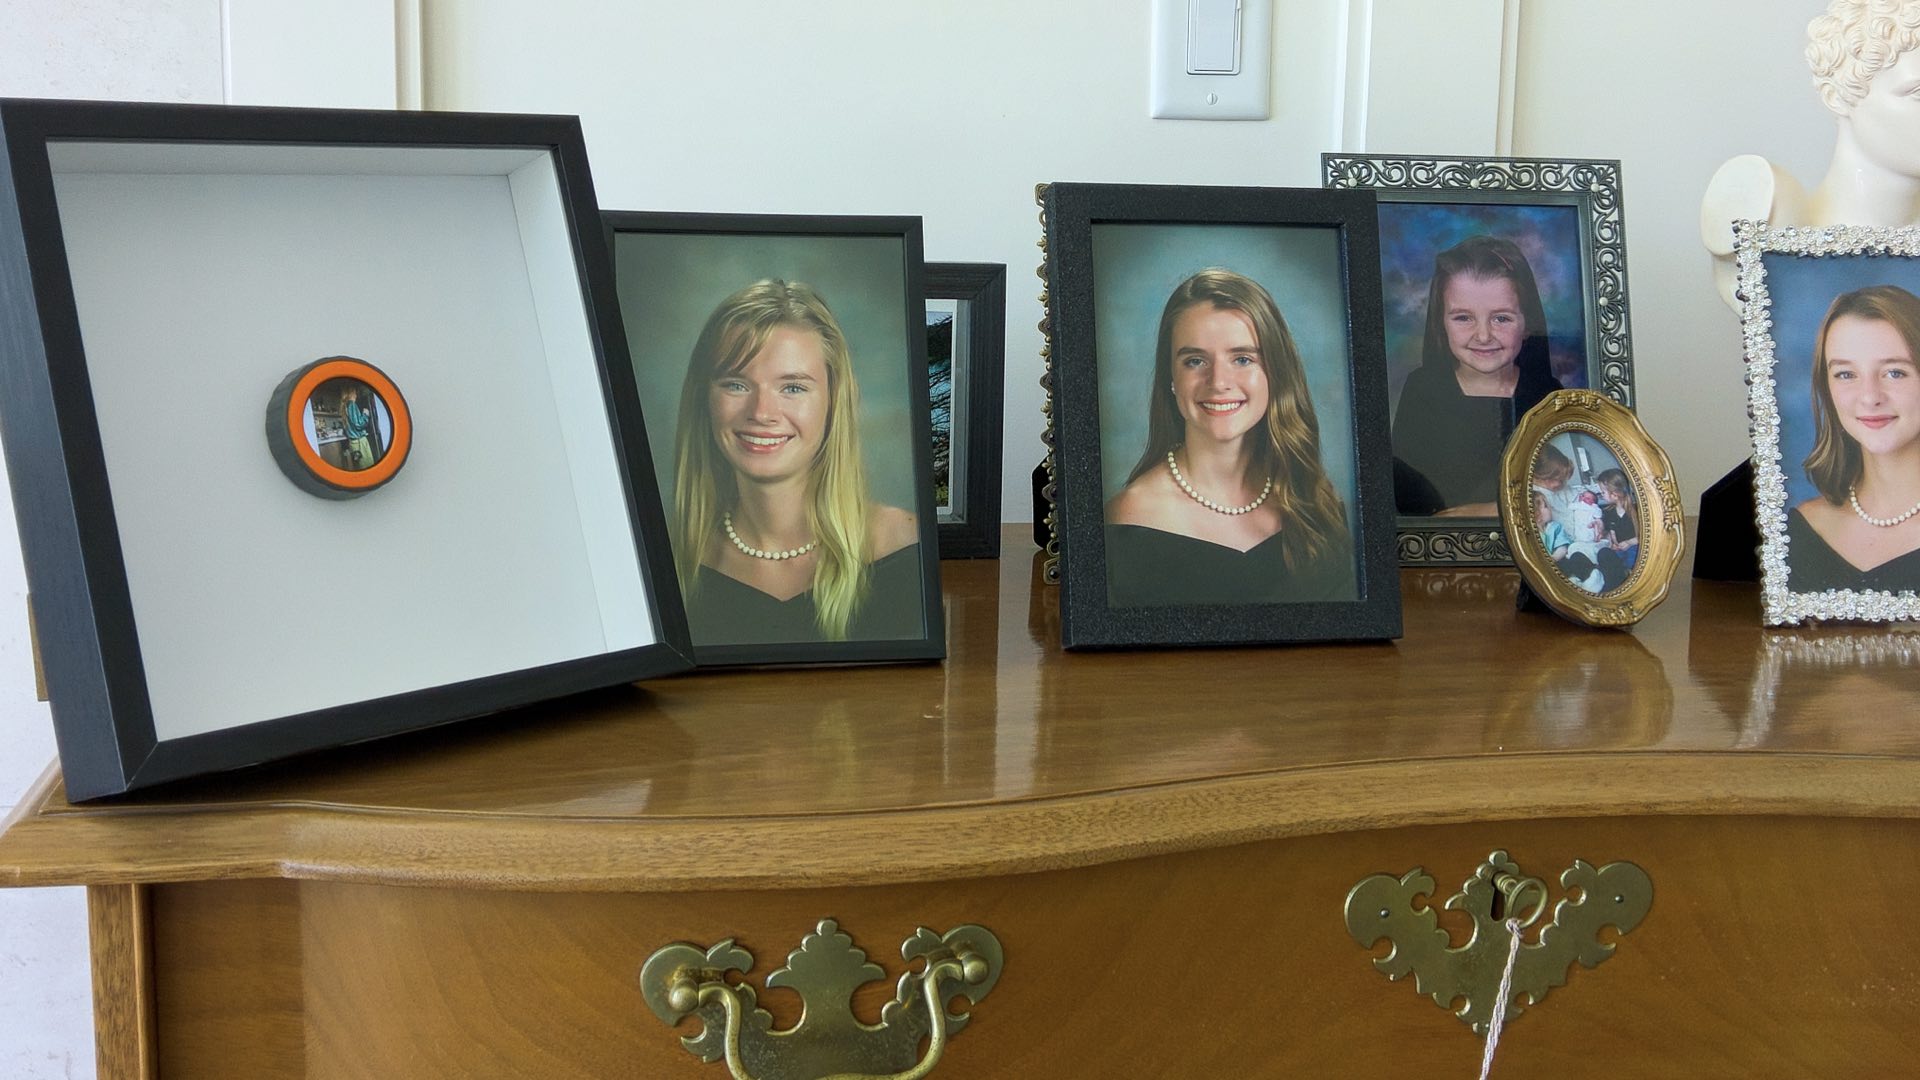
Whew; that was an arduous journey, however your reward is sort of prepared. Take away the retaining ring from the M5Dial, slip the dial inside your shadowbox, wiggle the dial via the again plate, and thread the retaining ring onto the dial. Add your most popular energy provide to the USB-C port on the M5Dial and look ahead to the white display screen to seem.

Twist the dial and shout with pleasure as every of your pictures seem in your new, leading edge interactive photographic show. One aspect impact that you’ll discover is that the show isn’t erased earlier than the subsequent {photograph} is rotated into view. Fortunately, when you’ve correctly sized your entire pictures to 240- x 240-px they’ll overlap one another and also you gained’t see any photographic remnants following every wrist twist.

Take pleasure in.