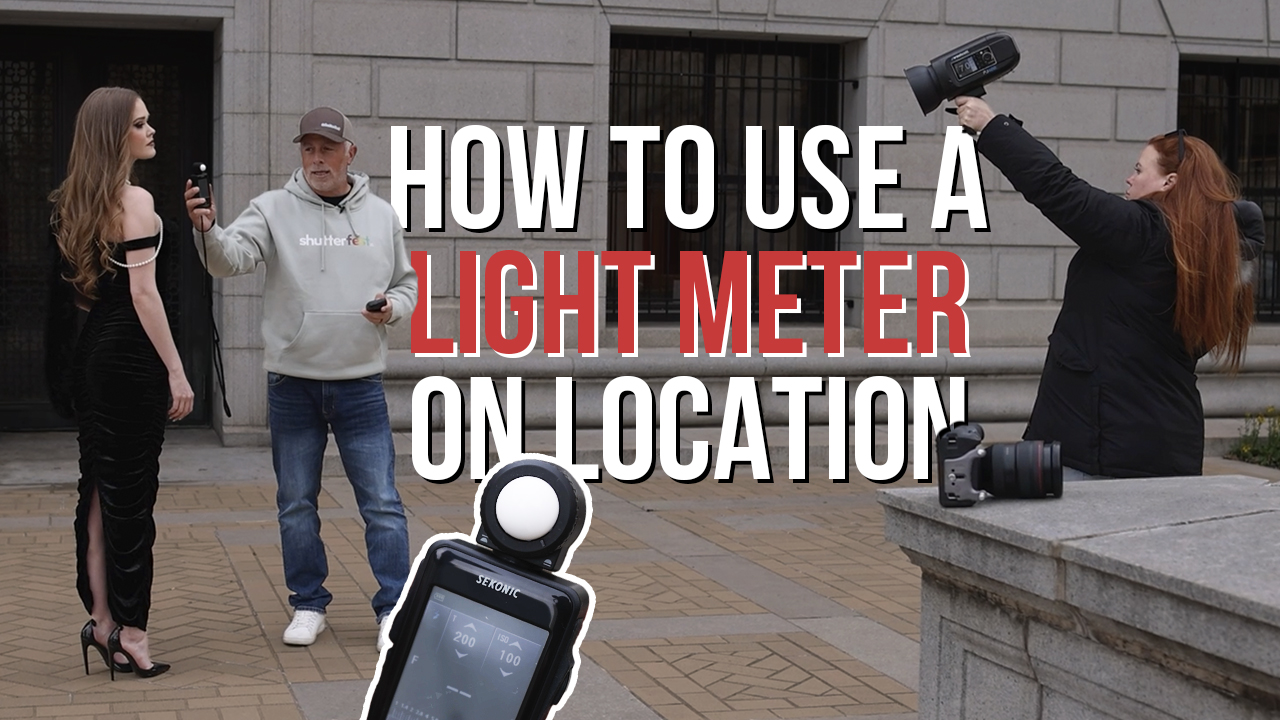
When you’ve ever felt intimidated by utilizing a lightweight meter on location, you’re not alone. Many photographers hear “mild meter” and suppose it’s an advanced or outdated instrument. However in actuality, it’s among the best methods to take management of your lighting—whether or not you’re working with pure mild or flash.
On this put up, we’ll break down precisely learn how to use a lightweight meter on location to create balanced, professional-looking pictures in any lighting situation.
GEAR USED IN THIS SETUP
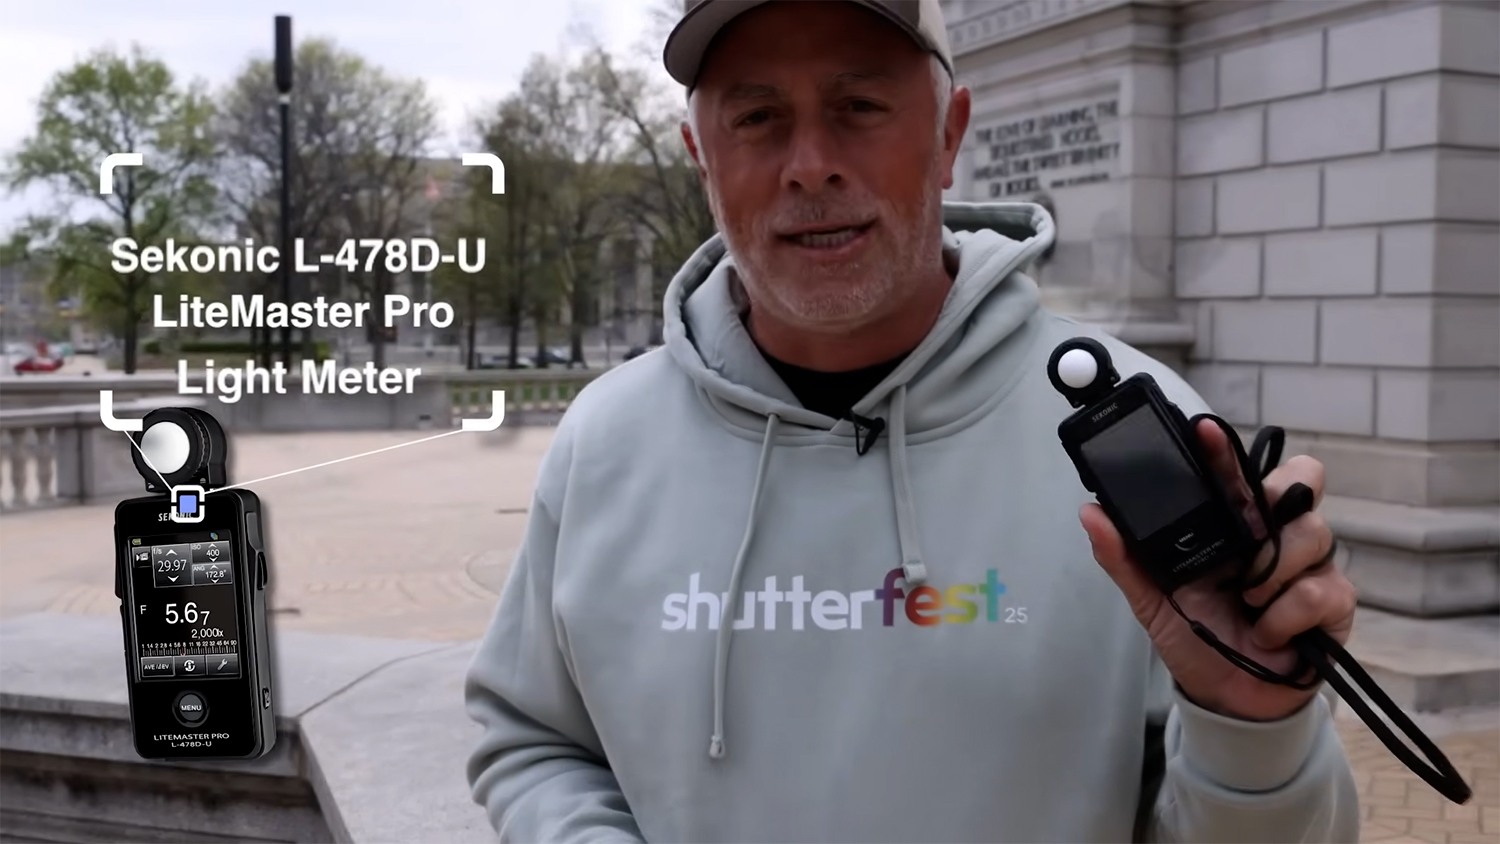
- Mild Meter: Sekonic Litemaster Professional L-478D-U
- Digital camera: Canon EOS R5
- Lens: Canon RF 28-70mm
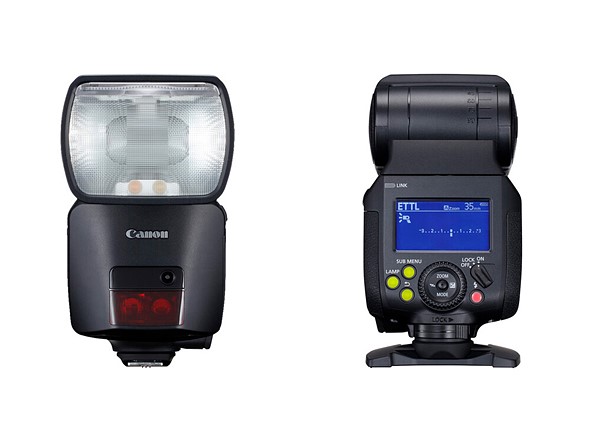
- Flash: Westcott FJ400
Group:
Photographer: Sal Cincotta
Mannequin: violet
Hair & Make-up: Brandi Patton, ReFine Magnificence
WHY USE A LIGHT METER ON LOCATION
When capturing on location, lighting circumstances may be unpredictable—clouds can shift, shadows transfer, and obtainable mild adjustments rapidly. A lightweight meter helps get rid of guesswork by supplying you with exact publicity readings, whether or not you’re utilizing ambient mild, flash, or a mixture of each.
Utilizing a lightweight meter lets you:
- Set your publicity precisely
- Stability ambient and synthetic mild
- Save time in post-processing
- Create constant outcomes throughout a number of pictures
Step 1: Metering for Ambient Mild
Let’s begin with pure mild. Suppose you’re photographing on a cloudy day—smooth, even mild with no robust highlights or shadows. Right here’s the way you’d use a lightweight meter in that situation:
- Set your digicam to guide mode – This offers you full management over your publicity.
- Dial in your required settings – For instance, you would possibly select:
- ISO: 100
- Shutter Pace: 1/2 hundredth sec
- Mild Meter Mode: Set to measure for aperture precedence
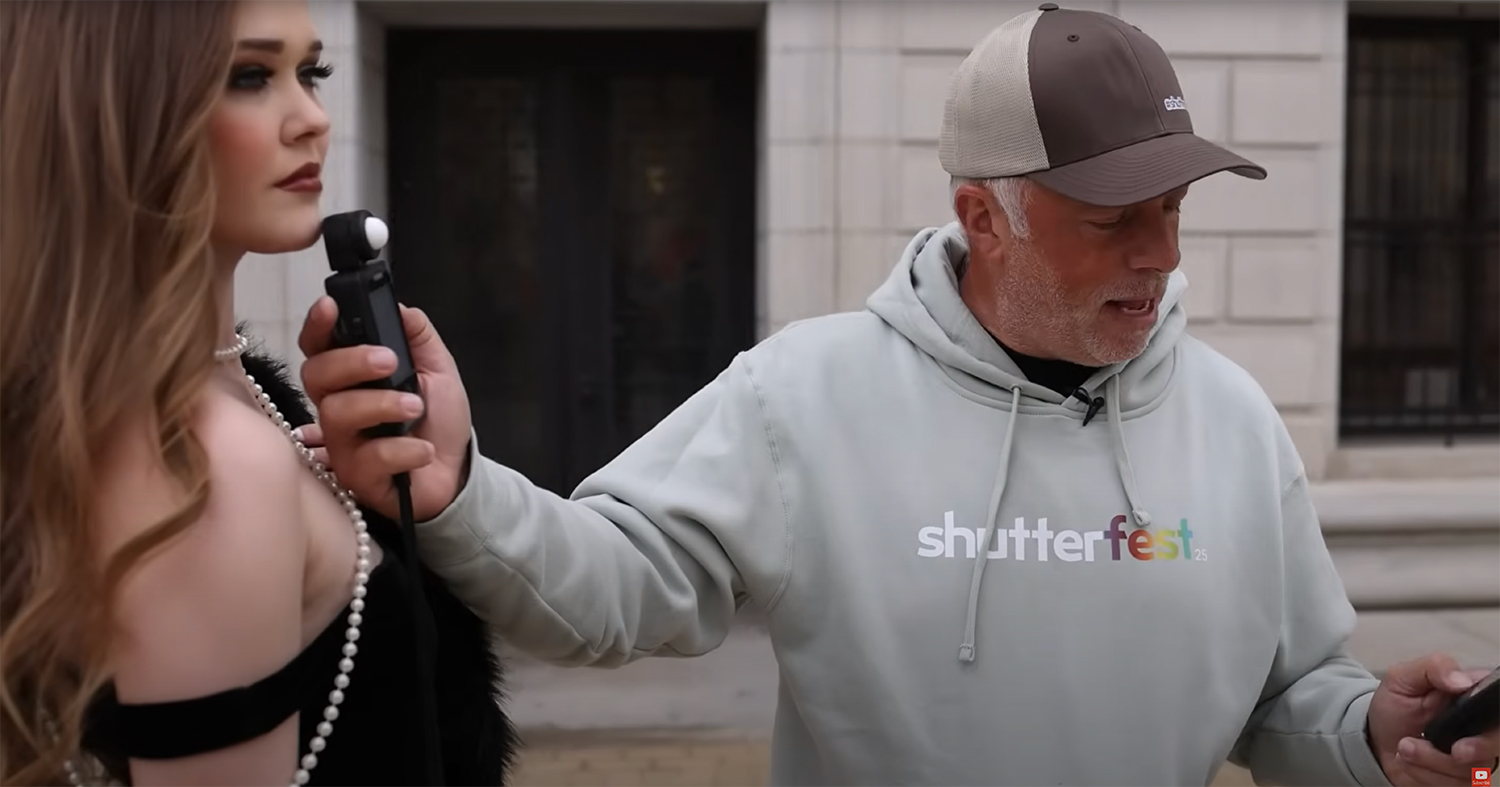
- Take a studying – Place the dome of the sunshine meter going through your topic and press the measure button. You’ll get an f-stop studying. Let’s say it reads f/4.5.
- Match your digicam settings – Set your aperture to f/4.5 and also you’re able to shoot.
This course of ensures your publicity is dialed in completely for the obtainable mild.
Step 2: Utilizing Flash With a Mild Meter
Now let’s elevate the scene. If the pure mild feels flat or lifeless, you’ll be able to add flash to carry dimension and distinction to your picture.
Right here’s learn how to use a lightweight meter with flash on location:
- Know your base publicity – Within the earlier instance, ambient mild was f/4.5. Which means the whole lot—the topic and the background—is being hit equally with that quantity of sunshine.
- Add a pop with flash – To make your topic stand out, you need the flash to reveal her at the next aperture (brighter publicity) than the background. As an illustration, purpose for f/8.
- Arrange your flash – Place your strobe (just like the Westcott FJ400) 6–10 toes out of your topic and switch it on.
- Change the sunshine meter to flash mode – Set your ISO to 100 and your shutter pace to 1/2 hundredth sec (your digicam’s flash sync pace).
- Take a flash studying – Level the meter towards the sunshine supply, fireplace the flash, and verify the studying. If it reads f/7, enhance flash energy barely and meter once more till you get f/8.
- Match the digicam – Set your aperture to f/8 and shoot. The topic will now be correctly lit by the flash, whereas the background stays barely darker (uncovered at f/4.5), creating separation and depth.
PRO TIPS FOR ON-LOCATION FLASH PHOTOGRAPHY
- Management the sunshine route – Angle your flash to keep away from spilling mild on the background. This helps preserve the ambient publicity separate.
- Train your assistant – When you work with somebody holding your mild, have them keep a constant distance and angle by “following the nostril” of your topic.
- Re-meter when shifting lights – Distance impacts energy. A couple of toes nearer or farther away can dramatically change your publicity.
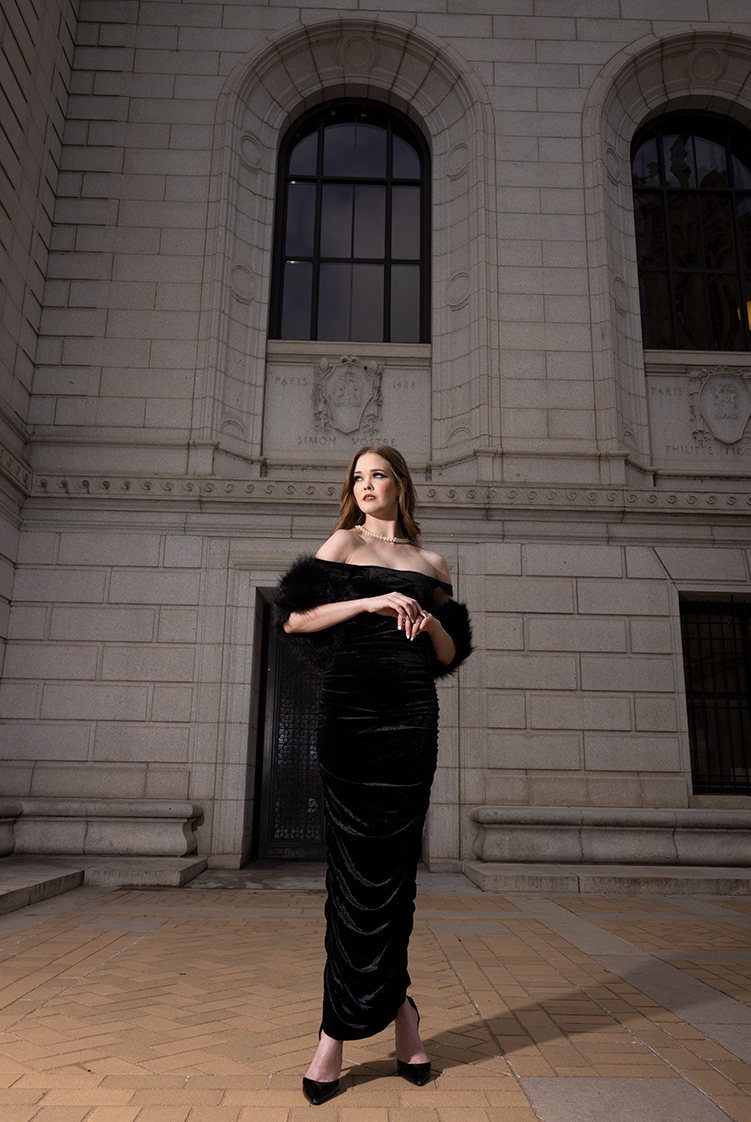
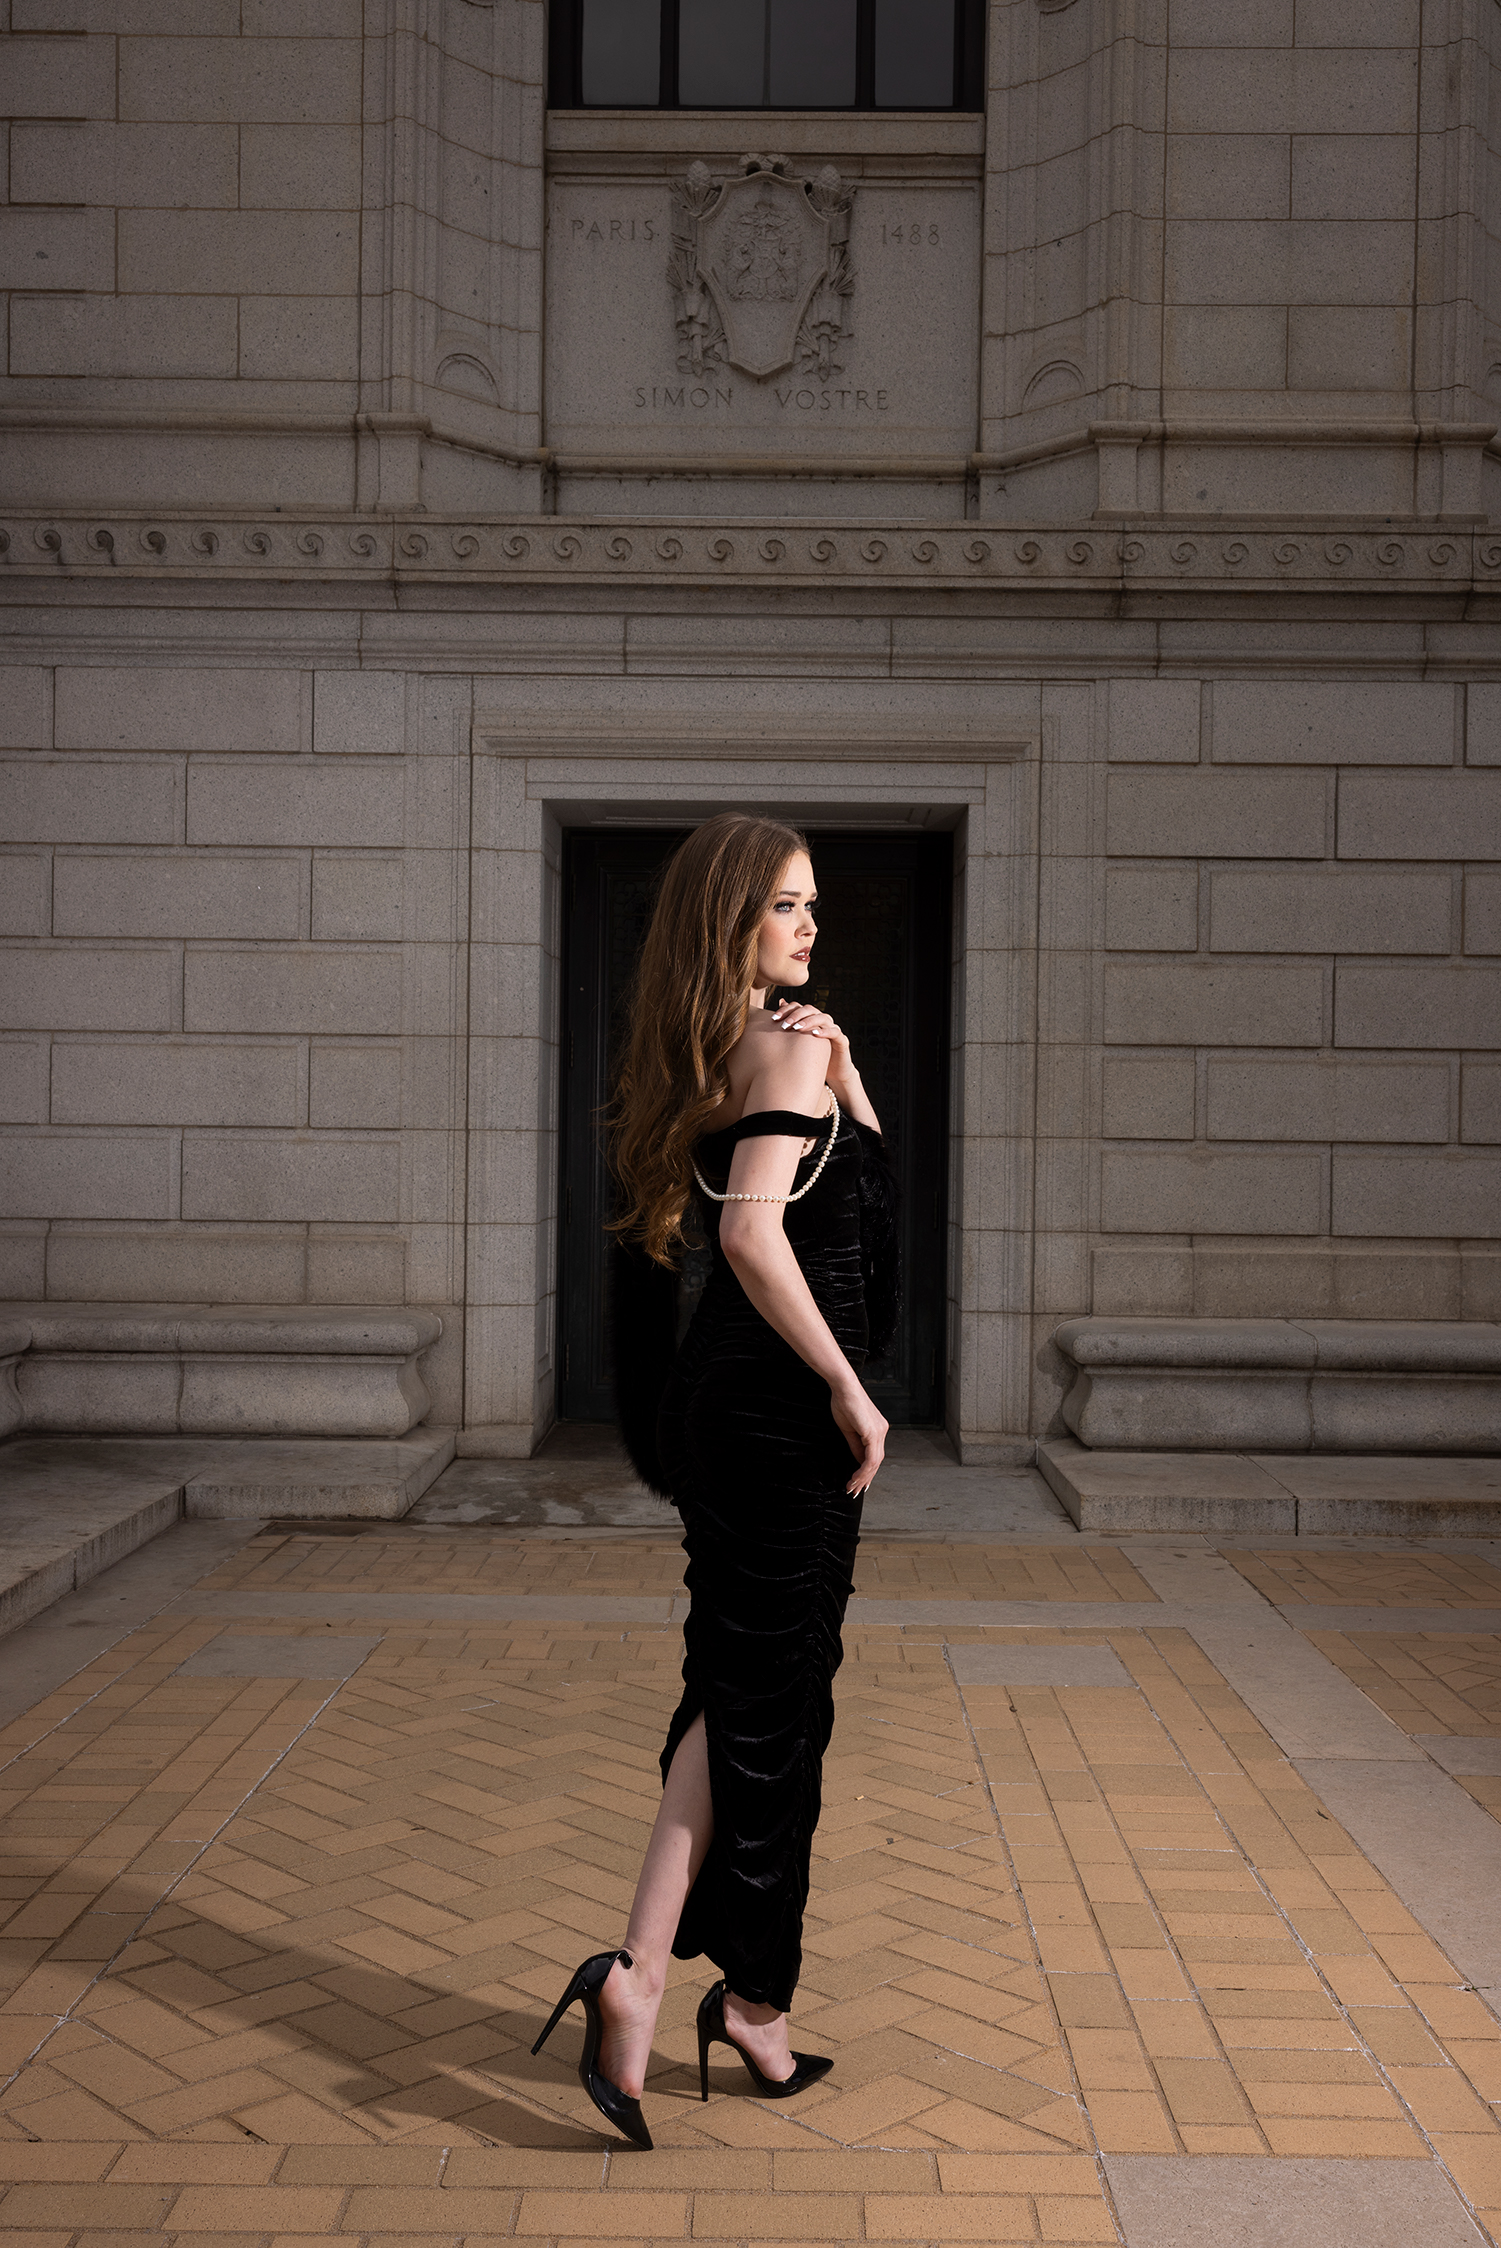
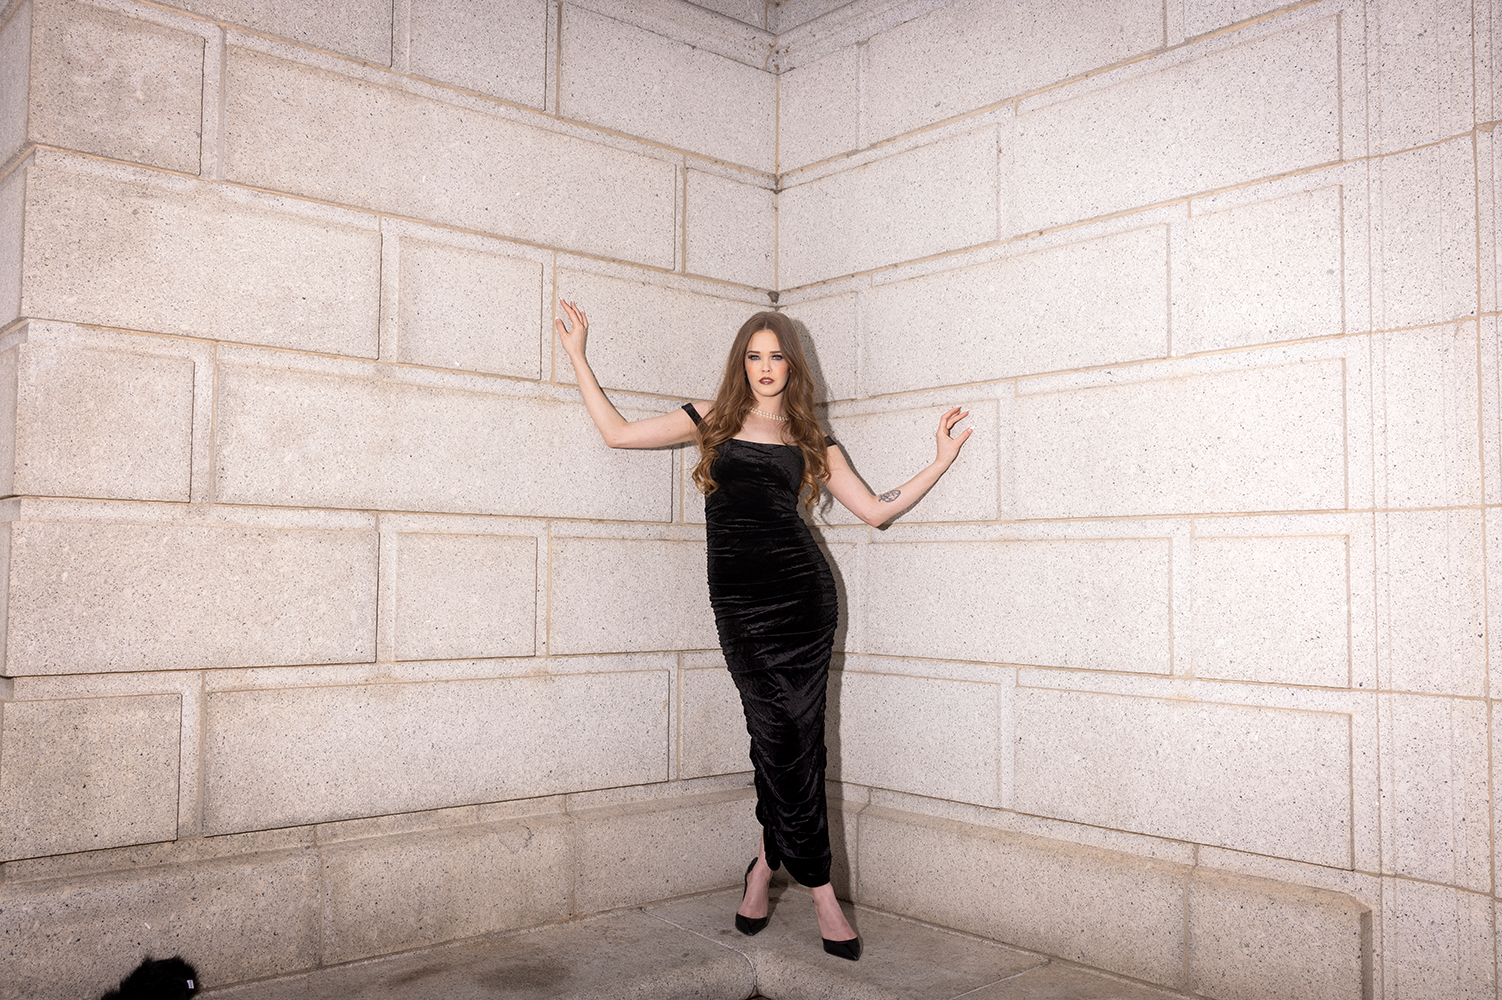
FINAL RESULTS: AMBIENT VS. FLASH
The distinction is placing. Ambient-only pictures on overcast days can look flat. However while you add flash and use a lightweight meter to manage the publicity, your topic pops with readability and distinction. You’ll see dramatic shadows, vibrant tones, and a extra polished, editorial look—all from taking the time to meter your mild.

Digital camera settings: F/4.5, 44.0 MM, ISO: 100, 1/200 S
FINAL THOUGHTS: WHY YOU SHOULD BE USING A LIGHT METER ON LOCATION
Studying learn how to use a lightweight meter on location isn’t nearly being exact—it’s about unlocking artistic freedom. You now not should depend on trial and error or overexpose your highlights whereas guessing in-camera.
Whether or not you’re a natural-light shooter or a strobe-lover, a lightweight meter provides you the management to make intentional, impactful pictures each time.
Wish to see it in motion? Try our behind-the-scenes video that walks you thru this setup step-by-step.
Tell us within the feedback: Do you utilize a lightweight meter in your workflow? Or are you excited about including one to your toolkit?