Steady lights are able to creating some amazingly dramatic portraits if you understand how to make use of them. We love steady lights for one primary motive – what you see is what you get. I’ve by no means been in a position to transfer this rapidly utilizing strobes. Organising strobes takes time, and should you resolve to maneuver, overlook about it—it’s a must to reset the whole lot. And if the lighting adjustments on you… nicely, you get the purpose. Steady lighting has opened up a world of potentialities for our portrait images studio, each indoors and out. Watch this reside photoshoot the place I create dynamic portraits utilizing steady lights in New York with among the most superb fashions and places on the market. Able to create some dynamic portraits utilizing steady lights? Let’s get to it.
Tools Used:
Digicam: Canon EOS R5
Lens: Canon RF 28-70mm F2, Canon RF85mm F1.2
Mild: Nanlite
Crew:
Photographer: Sal Cincotta
Mannequin: Heather, Corrin, Faren
Hair & Make-up: Brandi Patton, ReFine Magnificence
All proper, guys, immediately we’re in Brooklyn. I’m instructing a workshop, and we’re working with Nanlite. We’ve bought a plethora of their lighting methods set as much as create these unbelievable portraits. We’re going to do all kinds of cool issues with them. We will change colours as a result of they’re bi-color; among the lights are daylight-balanced, others tungsten-balanced, permitting us to actually management coloration. We’re additionally utilizing a ton of modifiers, like barn doorways, Fresnel lenses, and their projector, which lets us forged patterns towards the wall and even on our topics. There are such a lot of cool issues we are able to do. Let’s have some enjoyable! We’ve bought three unbelievable fashions right here, and we’re going to make some superb photographs. Let’s get to it!
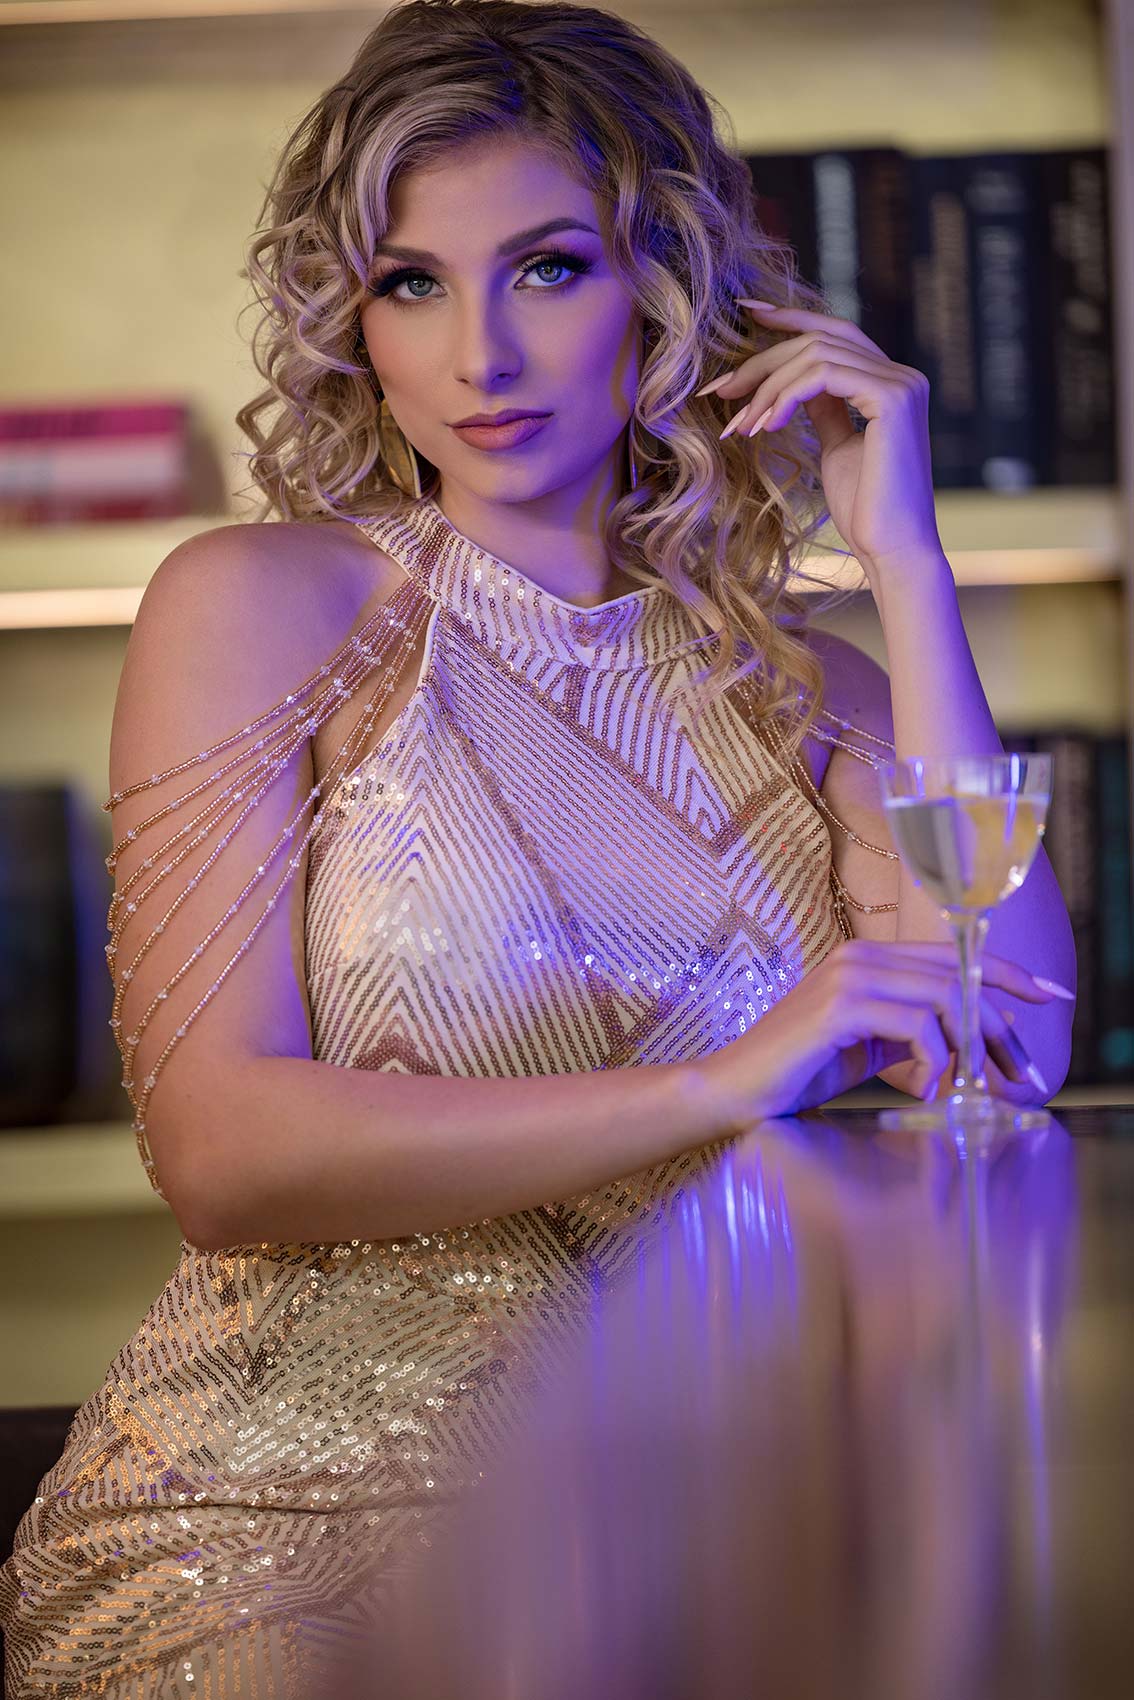
First, we’ll be taking pictures at 5,000 Kelvin on the digicam, proper? Set your cameras up and keep away from utilizing auto for among the stuff we’re doing immediately. Exterior, I might shoot in auto, however on this setting, I’d like us to regulate it. So, we’ll shoot at 5,000. I’m additionally altering my angle to get a greater shot. I’m simply ensuring I don’t have a globe popping out of her head.
Additionally, one of many issues Alissa and I at all times love to do is search for reflections wherever we go. Typically you discover them, generally you don’t. However you at all times begin along with your normal inventory shot after which spend just a little further time trying to find that “Holy shit! That’s so fully totally different” second. The pose additionally must make sense to me; I don’t assume she needs to be making eye contact with the digicam. I actually like that lean-back pose—it’s attractive and matches the whole lot completely. In a scene like this, you might use it for a bride and even for boudoir.
Settings: f/2 @ 1/160, ISO 200
Let’s go to our subsequent scene on the bar. I might shoot down this bar to make it extra attention-grabbing. The apparent shot could be to only shoot down the bar, however then there’s no context or attention-grabbing parts within the foreground. It’s at all times about discovering methods to boost the shot. So begin considering and dealing progressively as you shoot. Now, we’ll begin constructing it. I’d have Alissa with me for this, and once more, that is one more reason I like these lights. We’re going to alter the setup to get a blue coloration. I’ll most likely place it over right here someplace. Now, I’m getting a little bit of that element.
Settings: f/2.8 @ 1/100, ISO 200
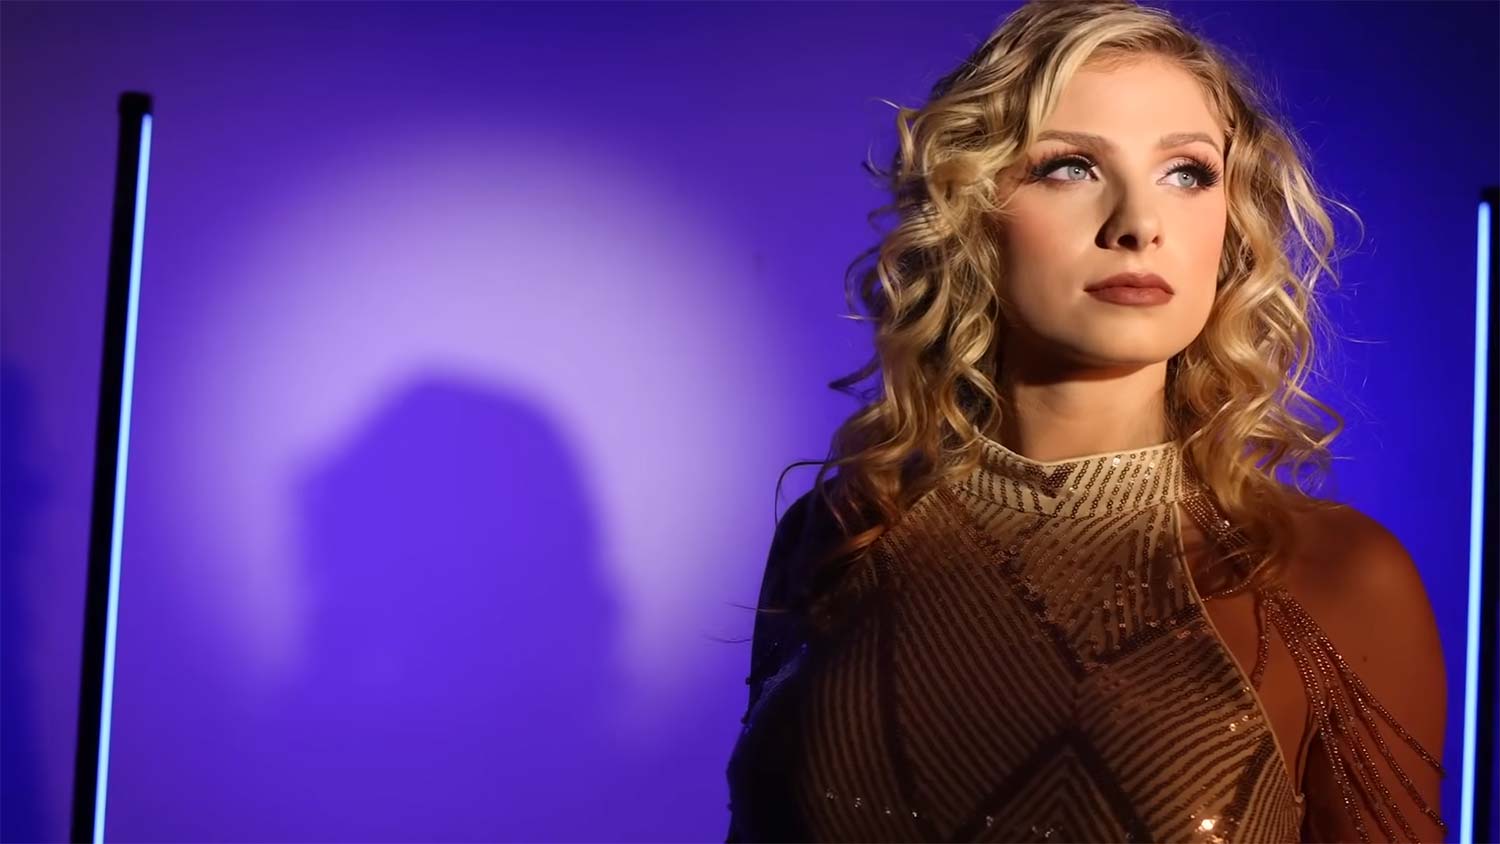
On this third scene, we’ve bought a number of totally different items of lighting gear. Thanks to the crew at Nanlite. What we needed to do right here was use this lighting setup, which presents full coloration or bi-color choices, together with tungsten, daylight, and full RGB. We will management the sunshine coloration right here and construct on this look. We’ll begin with simply this setup, utilizing two of the PavoTubes on the background to create coloration.
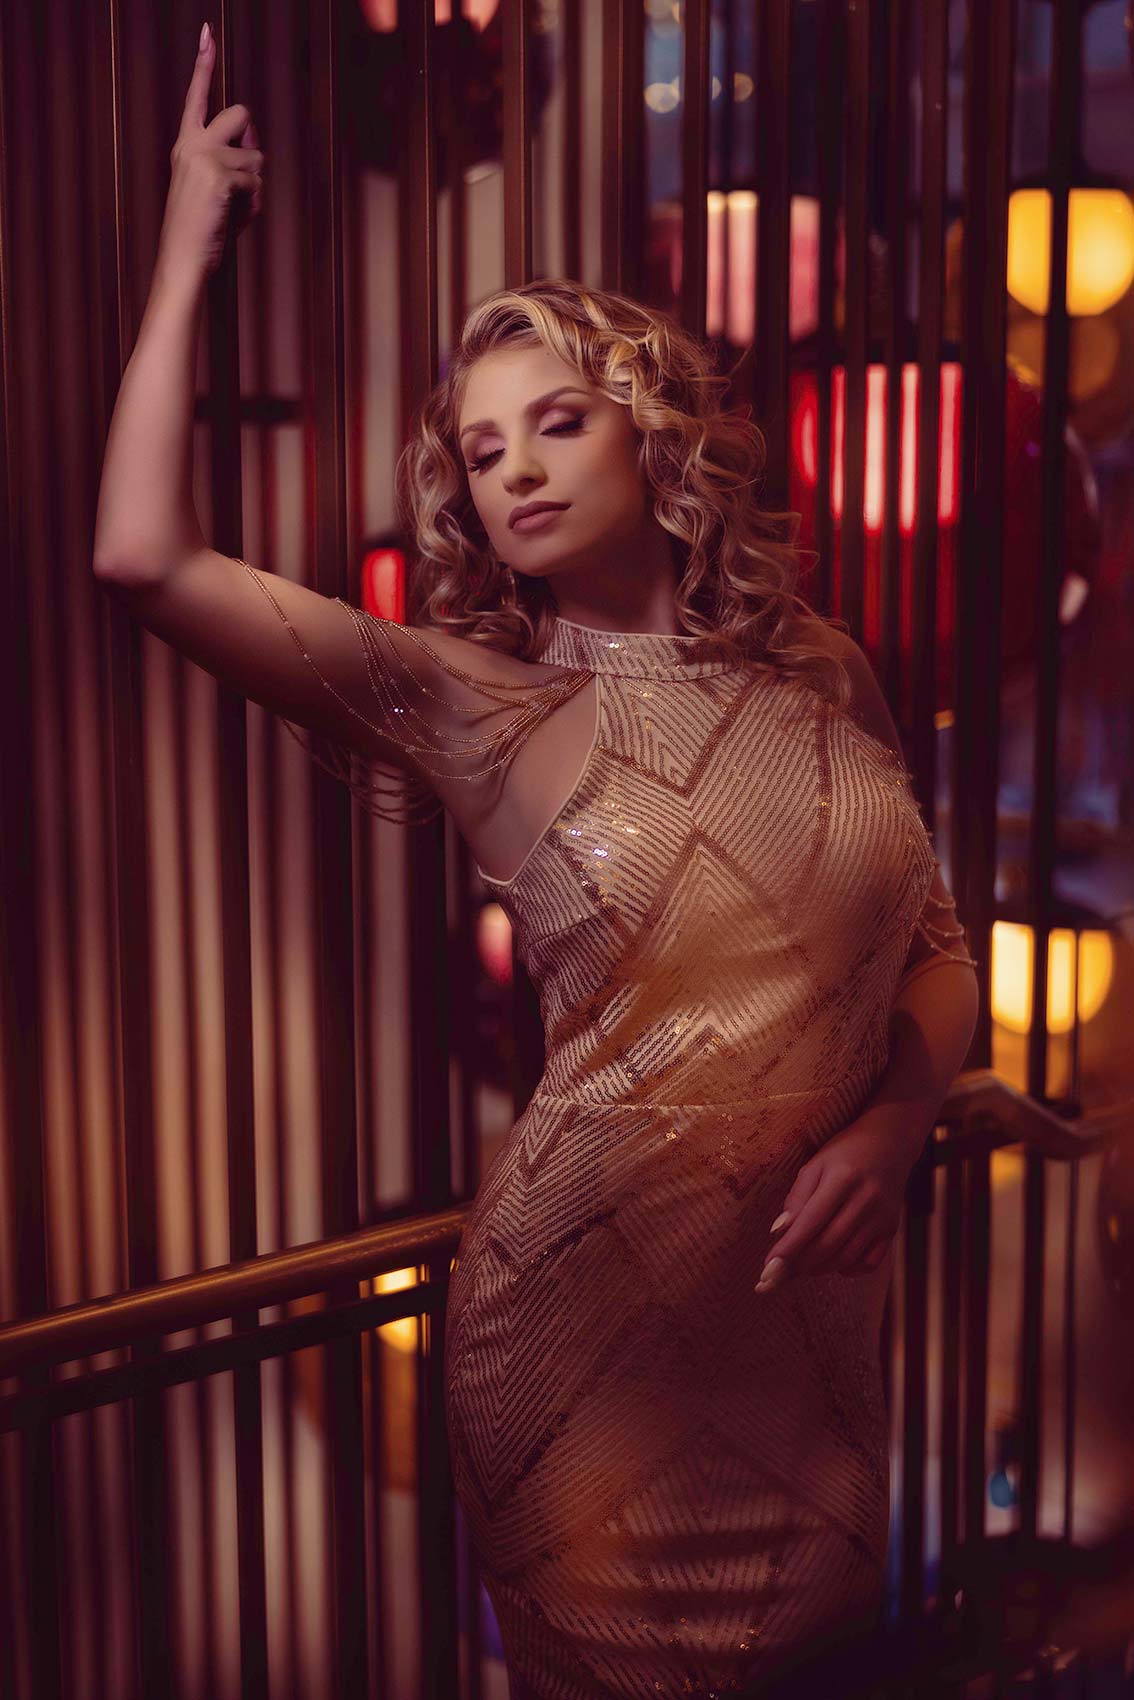
However right here what we’re doing is creating this high-fashion, previous Hollywood look. These will most likely look unbelievable in black and white should you convert them, however they’re additionally going to look good in coloration as nicely. After which what we’re doing right here is simply establishing two of the PavoTubes, the sixes, which we’re utilizing all day immediately to create just a little bit extra of an edge gentle and separation for her.
On this fourth scene, we’ve bought bronze and a few inexperienced within the head piece. I needed to go together with extra yellows on this, so we’ve bought a mixture of coloration temperatures happening right here.
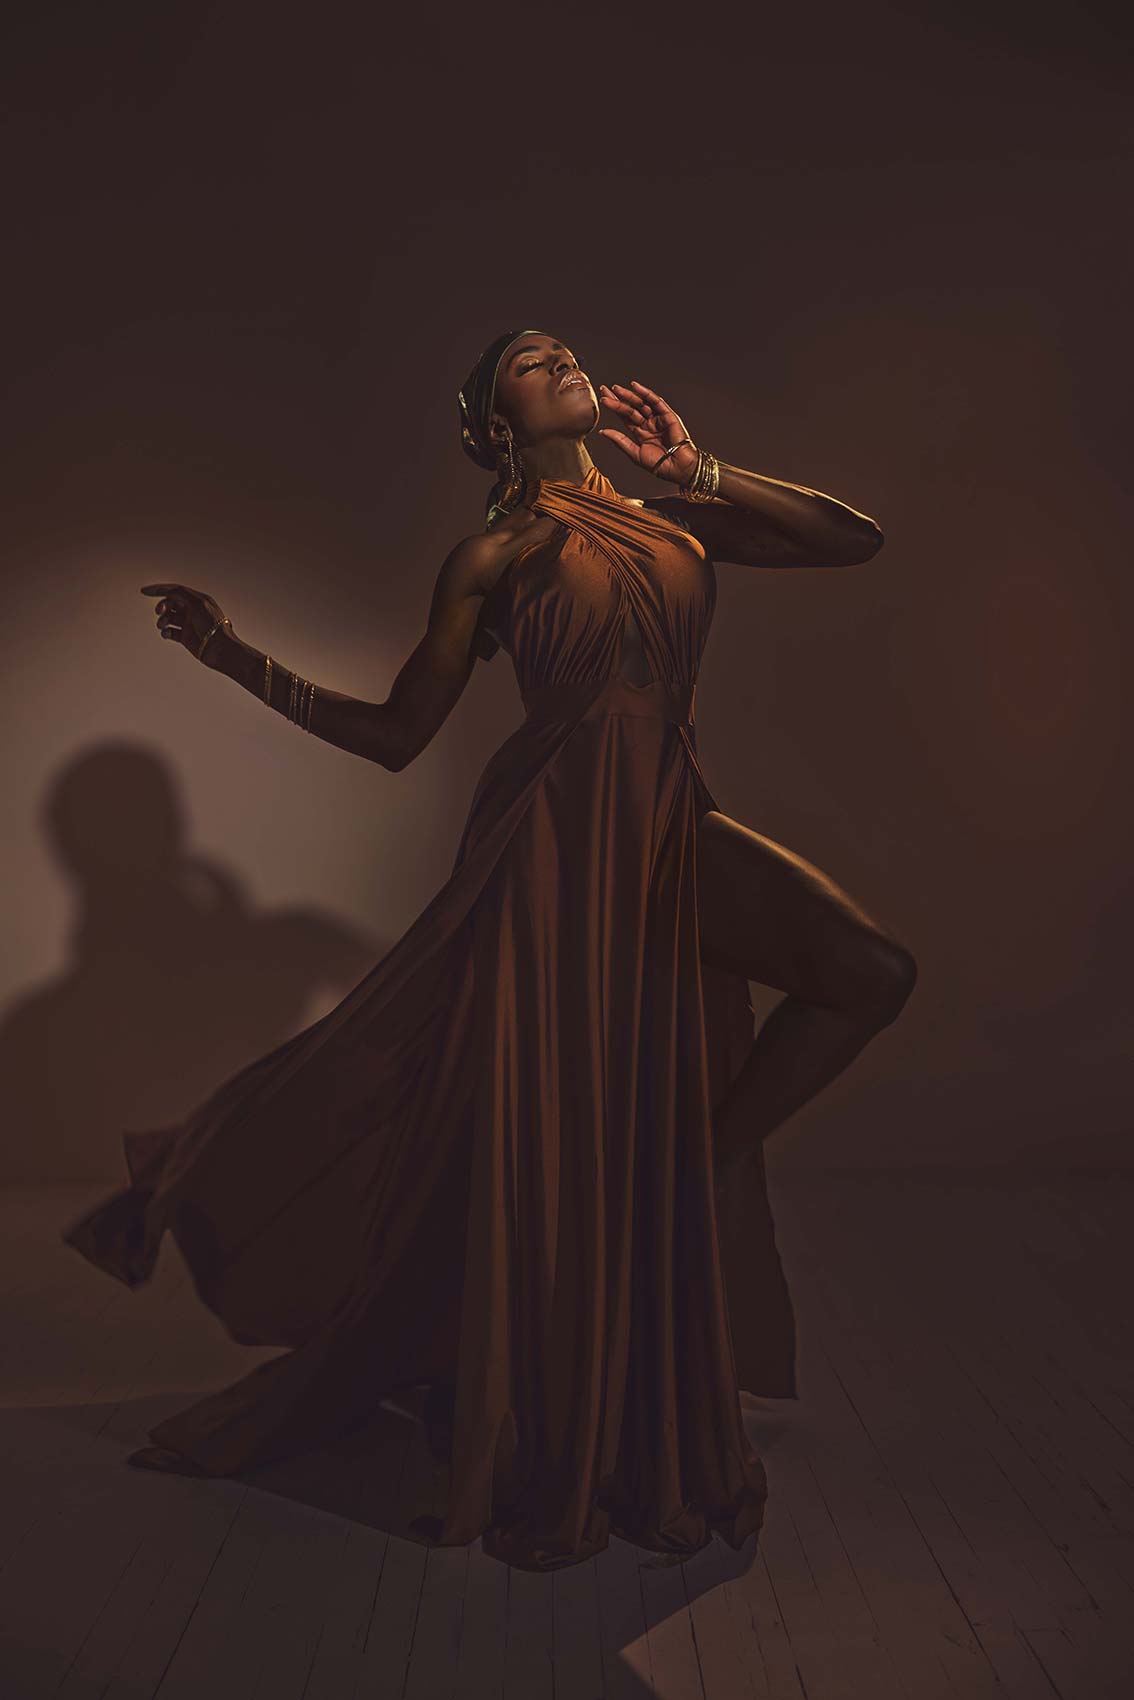
Settings: f/2 @ 1/200, ISO 200
All proper, guys, so what we’re going to do now, for the final shot down right here utilizing this gentle setup earlier than we head as much as the roof, is create a dramatic ‘Girl in Crimson’ scene. On the background we’re going to make use of RGB. We’re going to fireside the crimson steady lights, after which we’ll combine up lights hidden within the entrance as nicely.
For me, there’s no want to make use of guide mode proper now. I’m taking pictures in aperture precedence and letting the digicam make these changes. Simply to revisit, we’ve the important thing gentle set to five,500 Kelvin at 50% depth, which is giving us a powerful shadow on the wall. We’re additionally reaching glorious pores and skin tones. To the bare eye, her pores and skin may seem a bit cool, however should you set your Kelvin to five,500, it would look very nice.
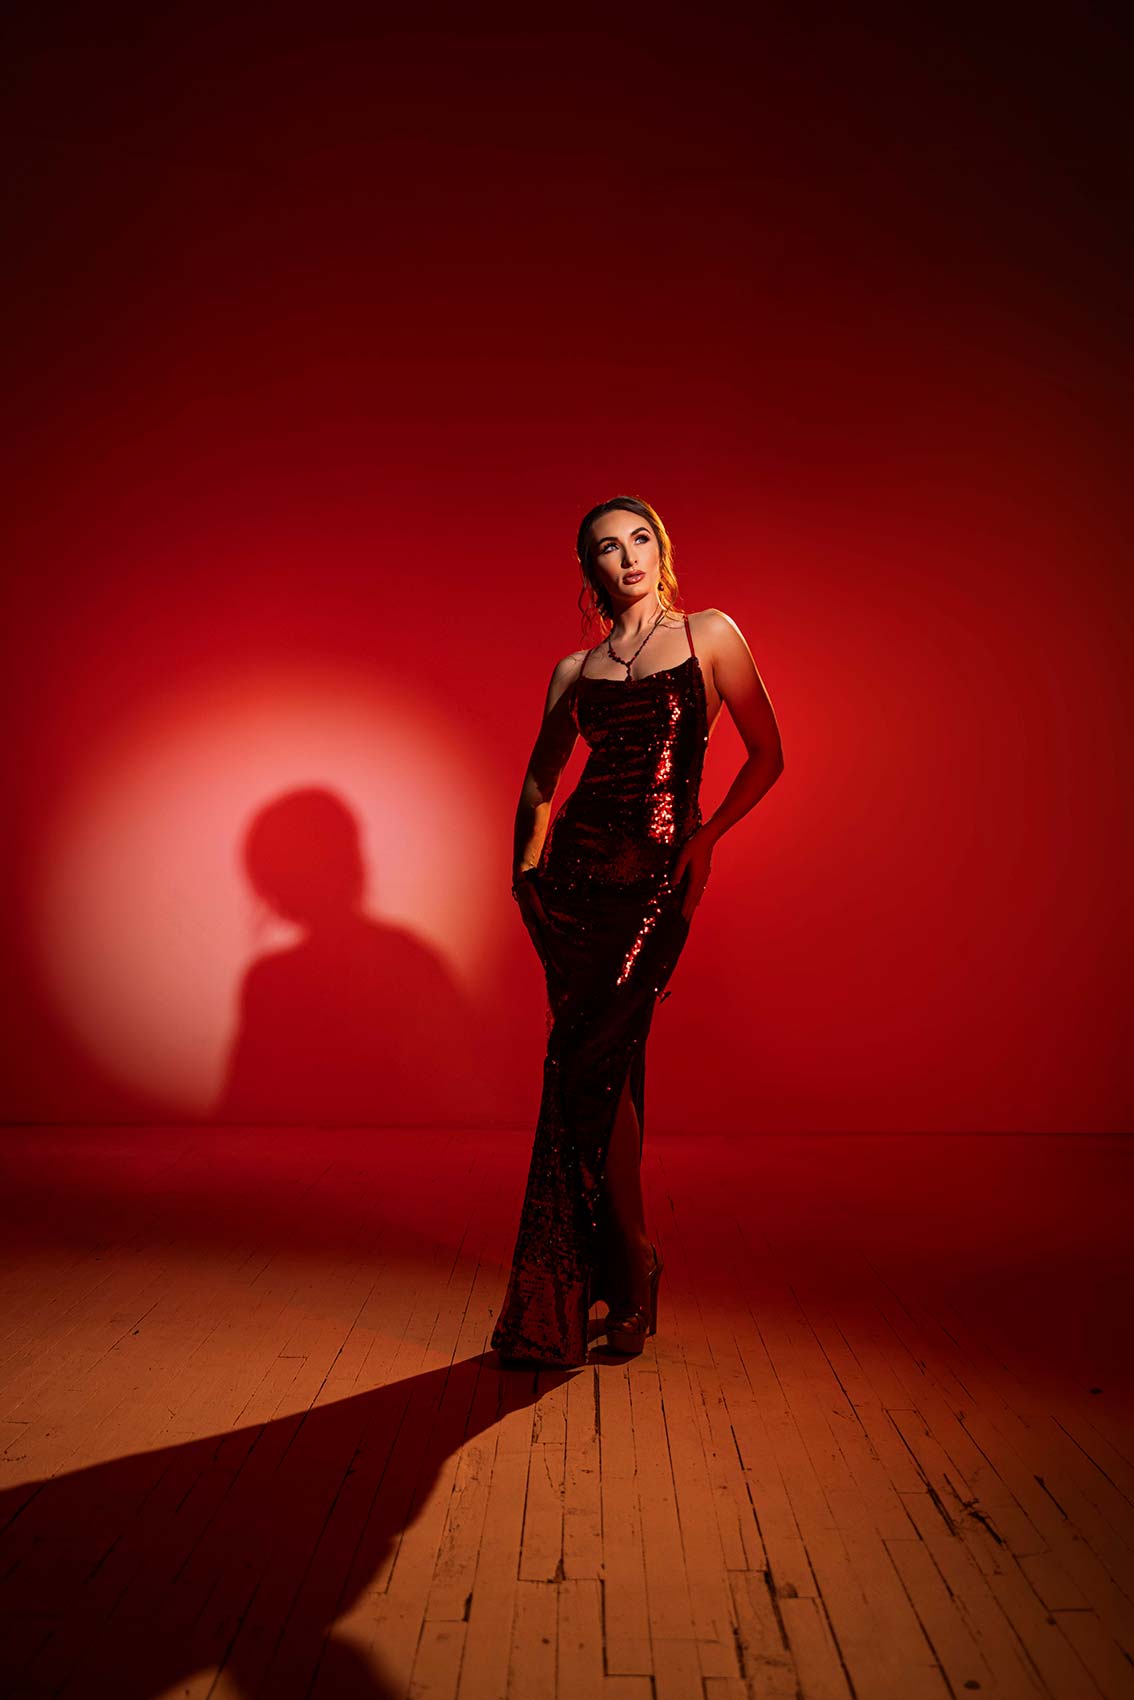
Settings: f/2 @ 1/200, ISO 200
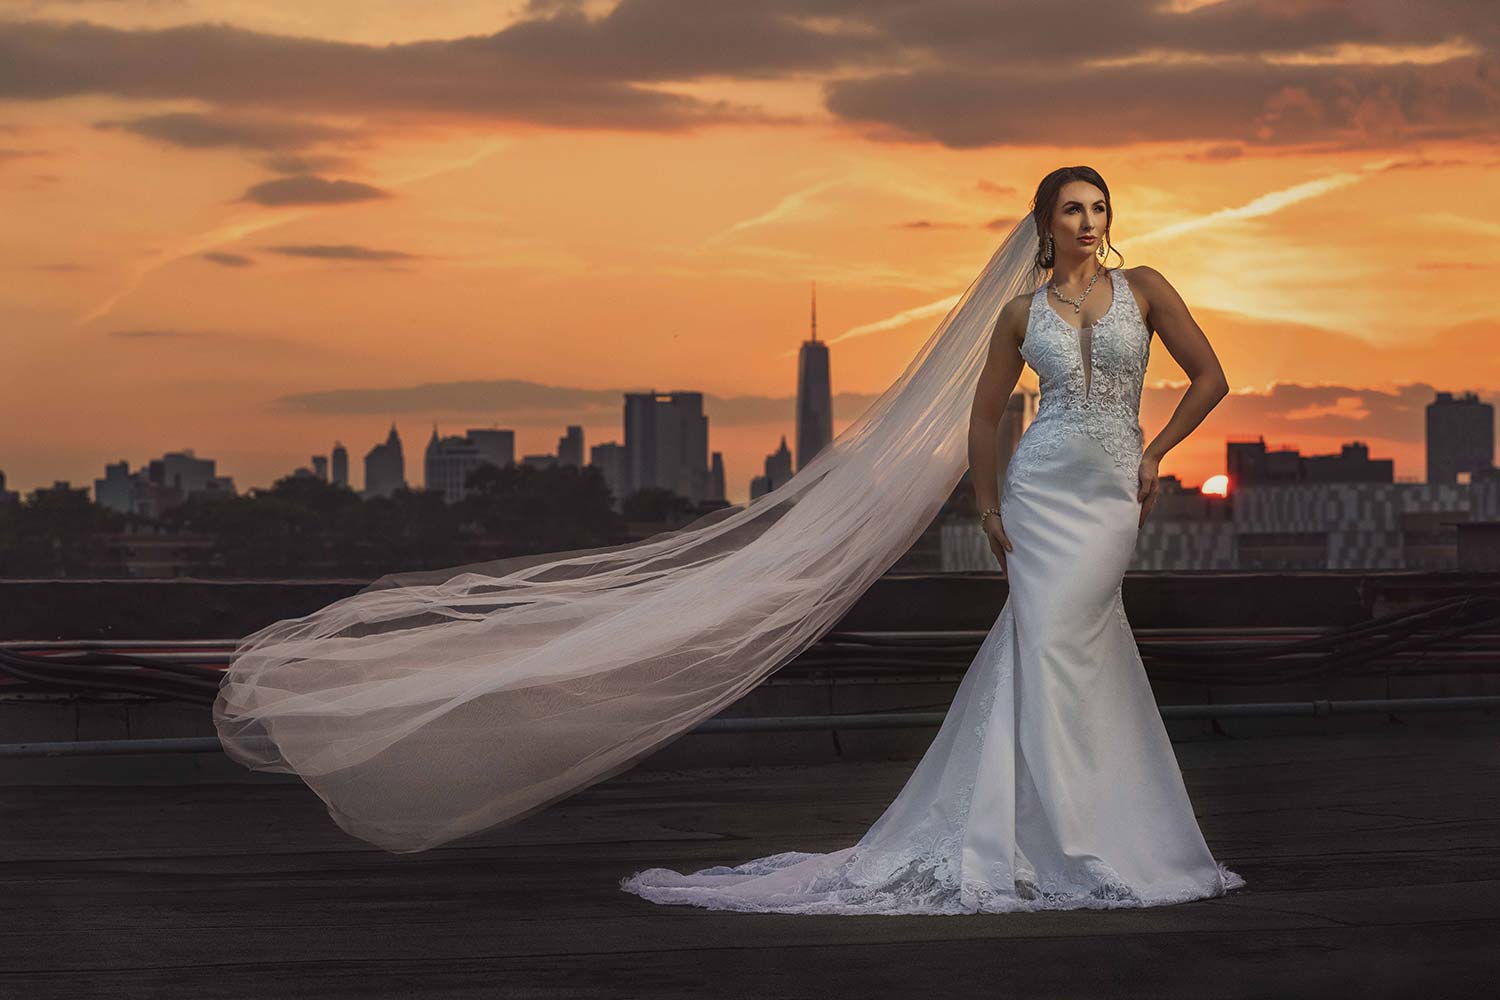
All proper, that is the final scene. We’re on a rooftop in Brooklyn performing some trend portraits. For this second shot, I need to ensure we seize the background, together with the skyscrapers and the New York Metropolis skyline. I like to recommend setting the aperture to round f/6.0 to f/8.0 and utilizing an extended lens to compress the scene. We’ll use a gold reflector to boost the lighting. I need to protect as a lot of that background element as potential. Whereas we are able to at all times blur it out in post-production, we are able to’t get well the element that’s not captured.
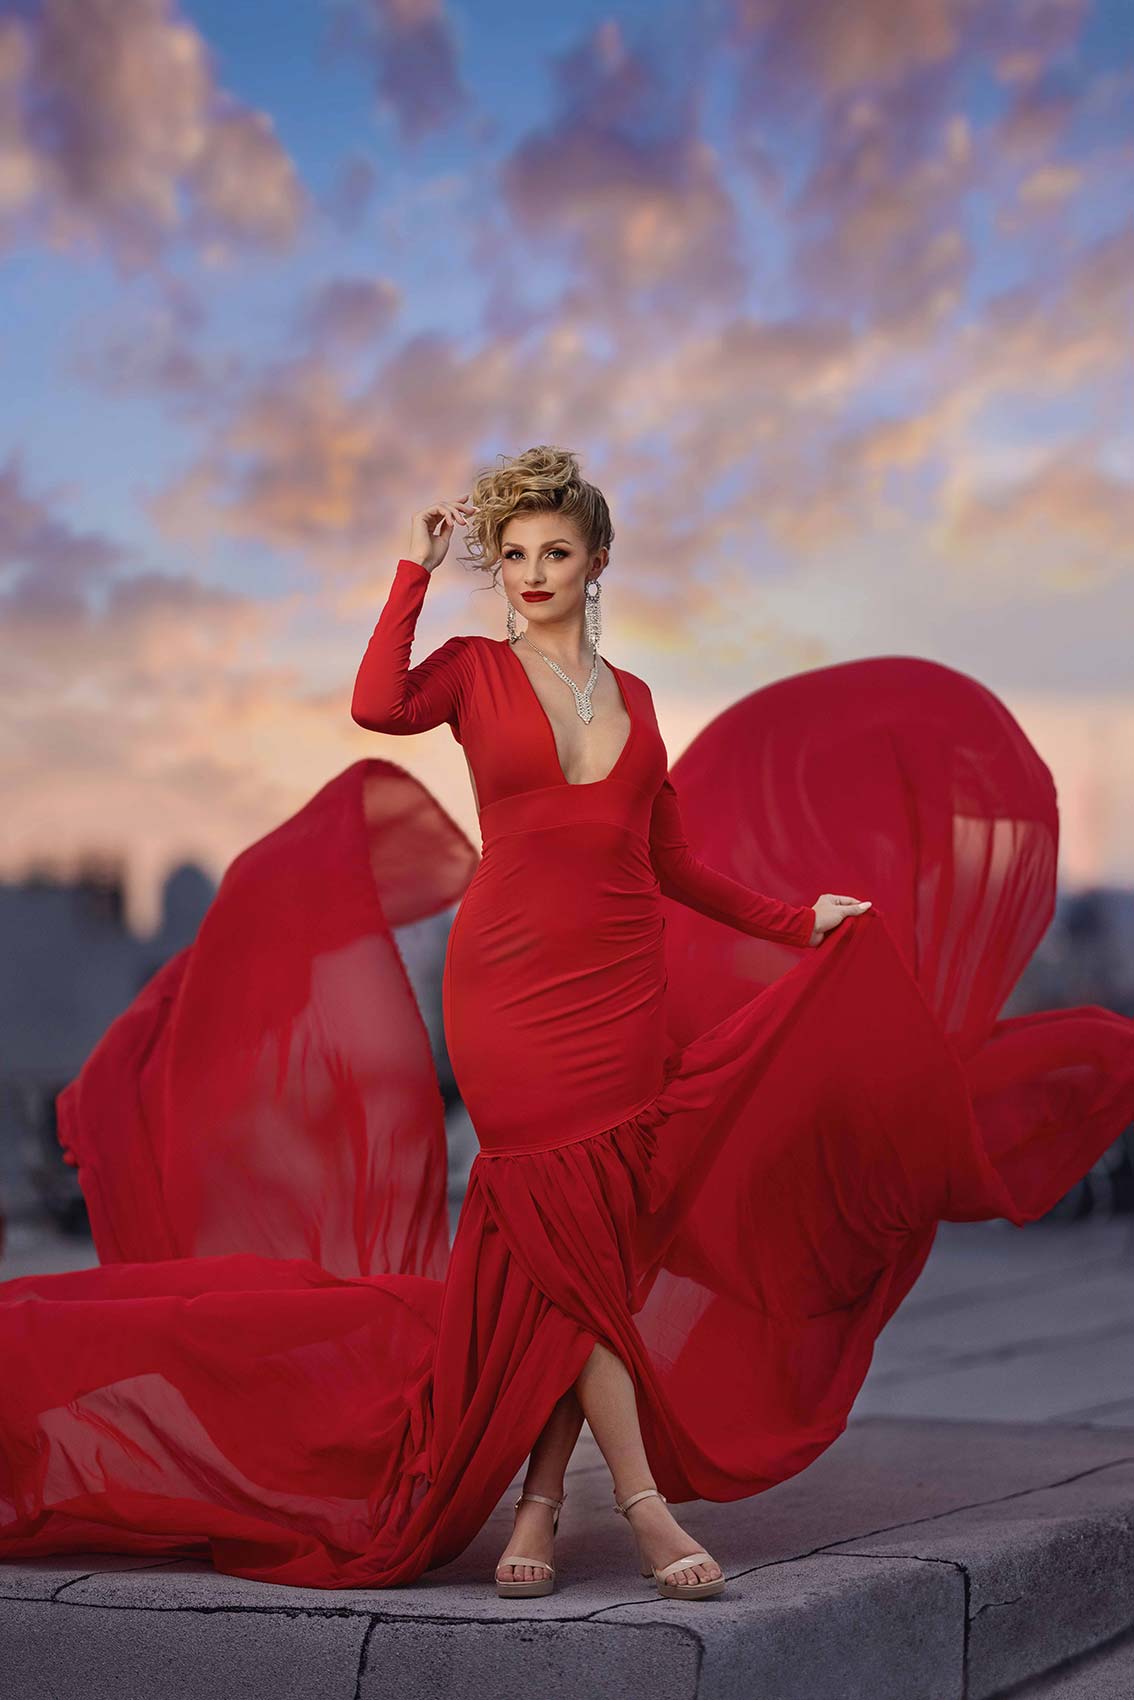
Settings: f/1.2 @ 1/2000, ISO 400
Settings: f/6.3 @ 1/400, ISO 400
All proper, everyone, that’s a wrap! I hope you loved the video and discovered one thing from it. Which shot was your favourite? We captured so many artistic photographs up right here on this rooftop and with our lighting setups. I can’t emphasize sufficient how vital steady gentle is for this type of work. We used the Nanlite Forza 60s (60B and 60C) and PavoTubes (30X and 6C) for lighting, and steady gentle proved to be invaluable. For those who’re a flash photographer, you could be questioning how you’d have arrange these pictures with a flash lighting system. Whereas it’s potential, you may’t transfer as rapidly as we did tonight. I do know you’re watching this on playback, however we had lower than 10 minutes because the solar was setting to create a few of these unbelievable photographs.
So once more, hopefully you loved this, discovered just a little one thing within the course of. Tell us down within the feedback which one was your favourite picture, and I’ll see you within the subsequent video.